
Cómo hacer
See who is subscribed to your newsletter
Knowing who is subscribed to your communications is something you will check often: to confirm a form is collecting sign-ups, to answer someone who asks why they get your emails, or to prepare a send to the people who signed up through a specific channel.
Nevent shows it to you from two angles. You can start from a subscription and see its whole list, or start from a person and see which subscriptions they belong to. In this guide you go through both, and you also set up the form so that it classifies each new subscriber on its own. About 8 minutes.
Before you start
Section titled “Before you start”You need at least one subscription created. If you do not have one yet, first follow the guide create your first subscription form.
Step 1: Open a subscription’s subscriber list
Section titled “Step 1: Open a subscription’s subscriber list”In the left side menu, in the Audience block, click Subscriptions.
You will see the list of all your forms, with each one’s name, its status and the number of subscribers it has collected. That counter already gives you a first reading of which one is working.
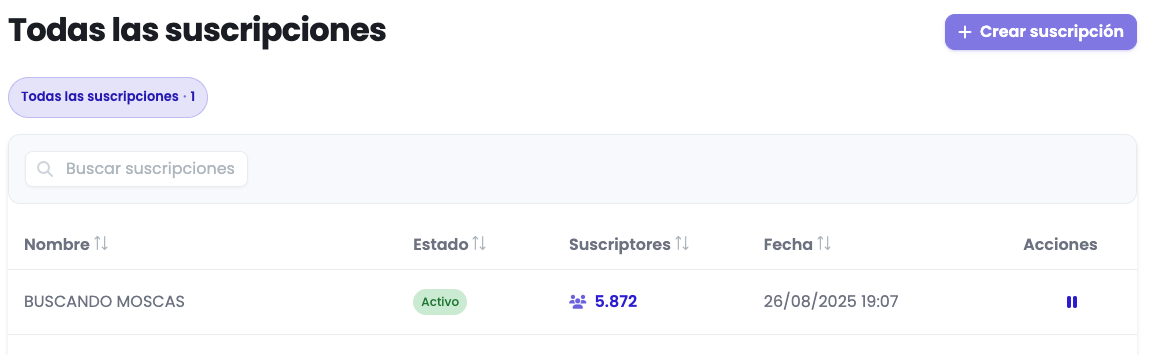
Click the form you want to check. Nevent opens its management panel.
In that panel’s side menu, click Subscribers.
Step 2: Read the list
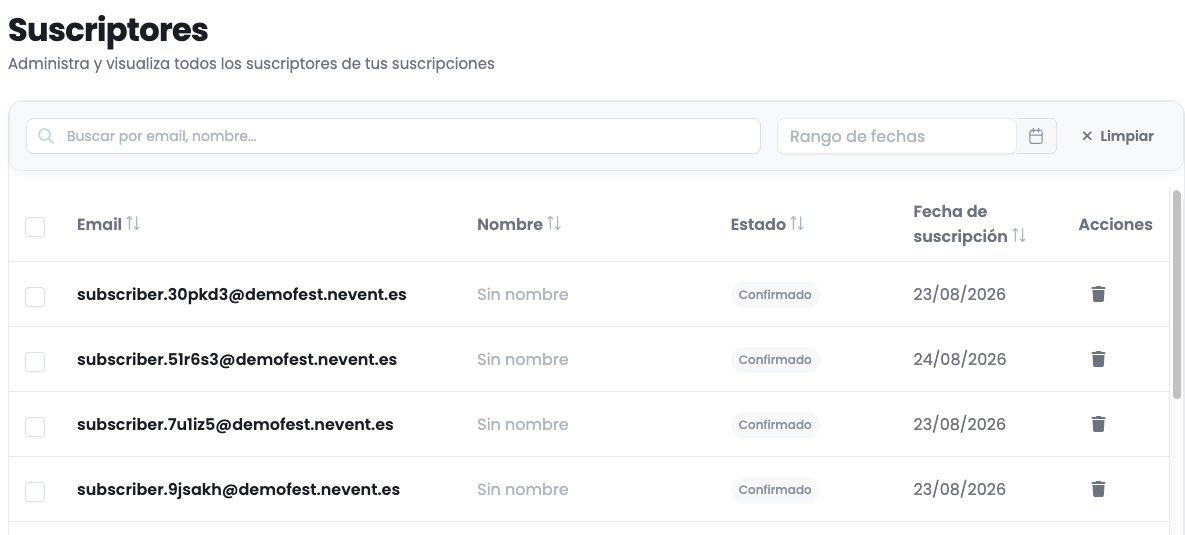
Section titled “Step 2: Read the list”Each row of the list is a person who signed up to that subscription. These are its four columns:
| Column | What it tells you |
|---|---|
| The email address they subscribed with. It is the minimum the form always asks for. | |
| Name | The person’s name, if your form asked for it. If it did not, it is empty. |
| Status | Whether they are still subscribed (Confirmed) or have unsubscribed (Opted out). |
| Subscription date | The exact day and time they signed up. |
You can sort all four columns by clicking their header. Subscription date is more useful than it looks: sorting by it you see at a glance whether your form is still collecting people or has been idle for weeks, and you can relate sign-up peaks to the actions you launched on those days.
Above the table you have two ways to narrow the list, which is what you will really use once you have thousands of subscribers:
- The search box, which filters by email or by name. It is for quickly checking whether a specific person is on this list.
- The date range, which keeps only the sign-ups between two days. With it you can answer questions such as how many people came in the week you launched the presale campaign.
The clear button removes both filters at once and brings back the full list.
Step 3: Check a specific fan’s subscriptions
Section titled “Step 3: Check a specific fan’s subscriptions”Sometimes the question goes the other way. You do not want a subscription’s list; you want to know what is going on with one particular person.
In the side menu, in the Fans block, click Fans.
Find the person by their name or email in the search box at the top of the table, and click their row to open their profile.
In the profile menu, click Subscriptions.
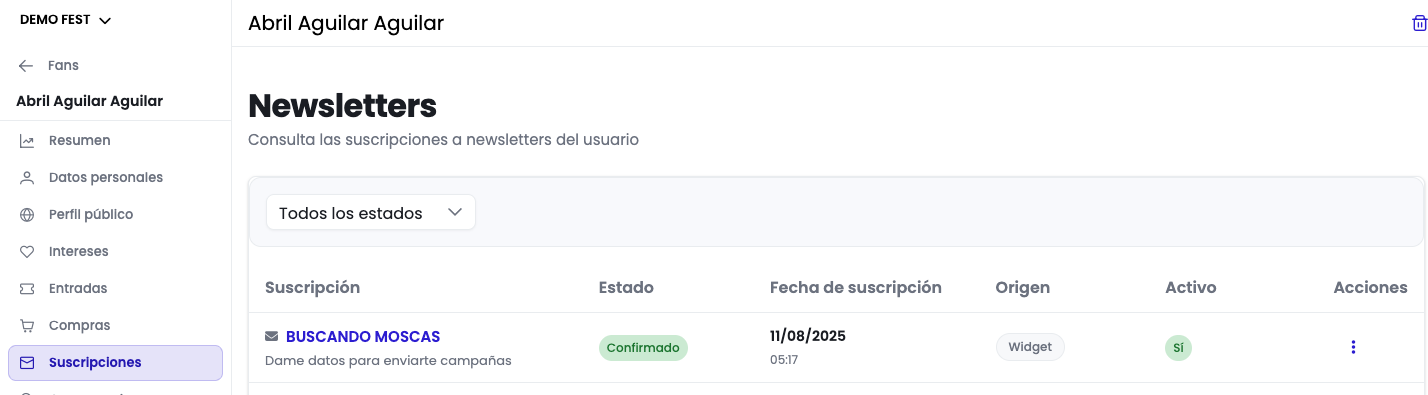
Here you see all the subscriptions in your organization that this person belongs to, one per row:
| Column | What it tells you |
|---|---|
| Subscription | The name of the form they signed up to, with its description below. |
| Status | Whether it is still Confirmed or Opted out. |
| Subscription date | The day and time they signed up. |
| Source | How they came in. Widget means they filled in the form embedded on a website. |
| Active | Whether that subscription is still active in your organization. |
The All statuses dropdown, above the table, lets you keep only the confirmed ones or only the opt-outs. It is useful for fans who have been with you for years and have several subscriptions.
This is the view you need when someone writes to you asking why they get, or do not get, your emails. In ten seconds you know whether they are subscribed, to what, since when and how they came in.
Step 4: Get new subscribers classified on their own
Section titled “Step 4: Get new subscribers classified on their own”Checking the list is fine, but what really saves work is having each person come in already labeled. You set that up only once.
Go back to Audience > Subscriptions, open your form and click Automations.
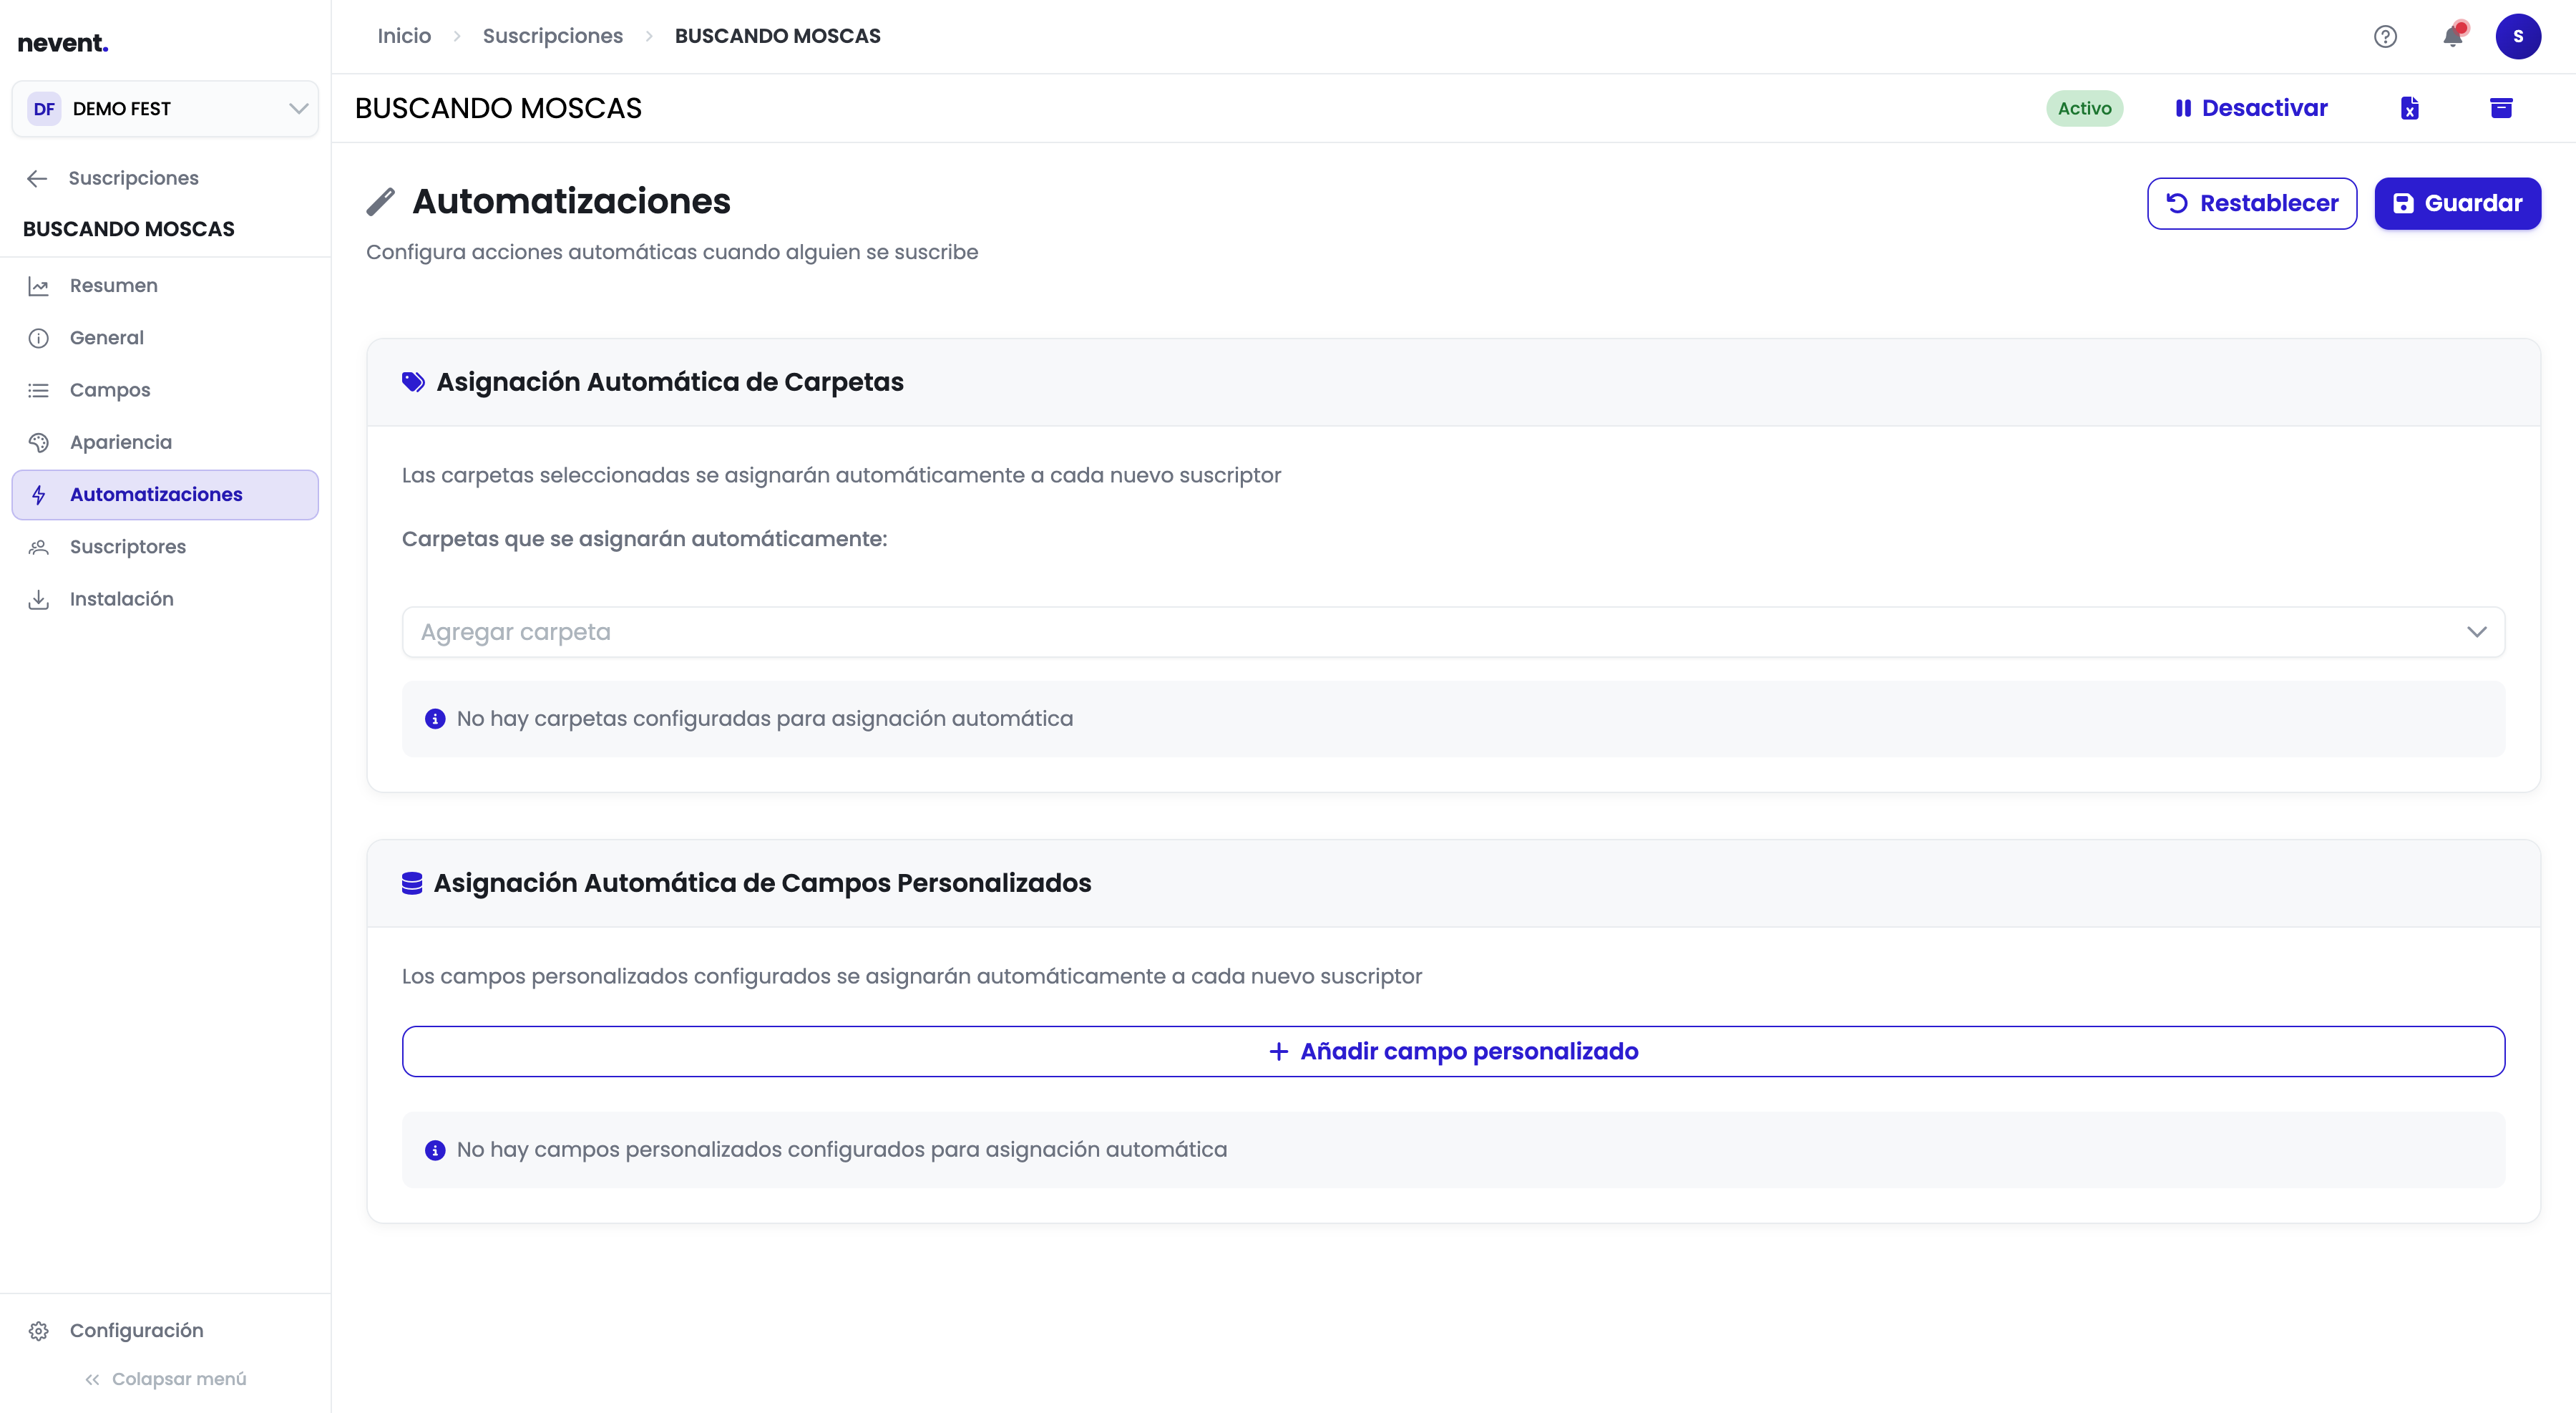
There are two things you can automate:
- Automatic folder assignment. Choose one or more folders of your organization. Everyone who subscribes through this form is assigned to them right away. For example, a folder called “Web 2026”.
- Automatic custom field assignment. If your organization has custom fields, you can give them a fixed value for everyone who comes in through here. For example, a “Source” field with the value “Web form”.
When you have chosen, click Save.
From then on, each new subscriber arrives with that information filled in. Those who were already subscribed are not changed.
Step 5: Use that classification to segment
Section titled “Step 5: Use that classification to segment”This is where the work of the previous step pays you back.
Custom fields are a direct segmentation criterion: you find them in the Fan attributes category when you build a segment. So you can create, for example, a segment of everyone whose “Source” field is “Web form” and send them a different campaign from the rest of your database.
With folders you can filter both when creating a segment and when choosing a campaign’s audience.
The practical result is that you can treat differently those who signed up on your website, those who did so at an in-person activation and those who came through a specific promotion, without ever having to separate them by hand.
If you have never created a segment, start with create your first segment.
Result
Section titled “Result”After this guide you know:
- Where the full subscriber list of any of your forms is, and what each column means.
- How to check, from a person’s record, which subscriptions they belong to and since when.
- How to set up the form so that it classifies each new subscriber on its own with a folder and a custom field.
- How to use that classification to segment and send different campaigns depending on where each fan came from.
Next step
Section titled “Next step”- Subscriptions reference, if you want the detail of all the fields, statuses and sections of the panel.
- View and manage a fan’s profile, to go through the rest of the record’s sections, beyond their subscriptions.
- Create your first segment, to turn this classification into campaign audiences.