
Cómo hacer
Add users to your organization
In Settings → Users you give your team access and keep track of who has access today and whom you have invited. From this screen you invite administrators by link, follow the status of each invitation and manage the people who are already members.
In this guide you invite an administrator and check their invitation. About 5 minutes.
Before you start
Section titled “Before you start”You need to be the owner or an administrator of the organization. If you are not, the dashboard will not let you invite anyone or remove anyone’s access.
Keep in mind that a Nevent account can only belong to one organization. If the person you want to invite is already in another one, they cannot accept with that same account.
Step 1: Open the users screen
Section titled “Step 1: Open the users screen”In the side menu, go to Settings and, in the Workspace block, click Users.
The screen has two blocks:
- Members: the people with access right now. Each row shows the person (name and email), their role, their access, their last activity and the available actions.
- Administrator invitations: the invitations you have sent, with their status and the status of the email delivery.
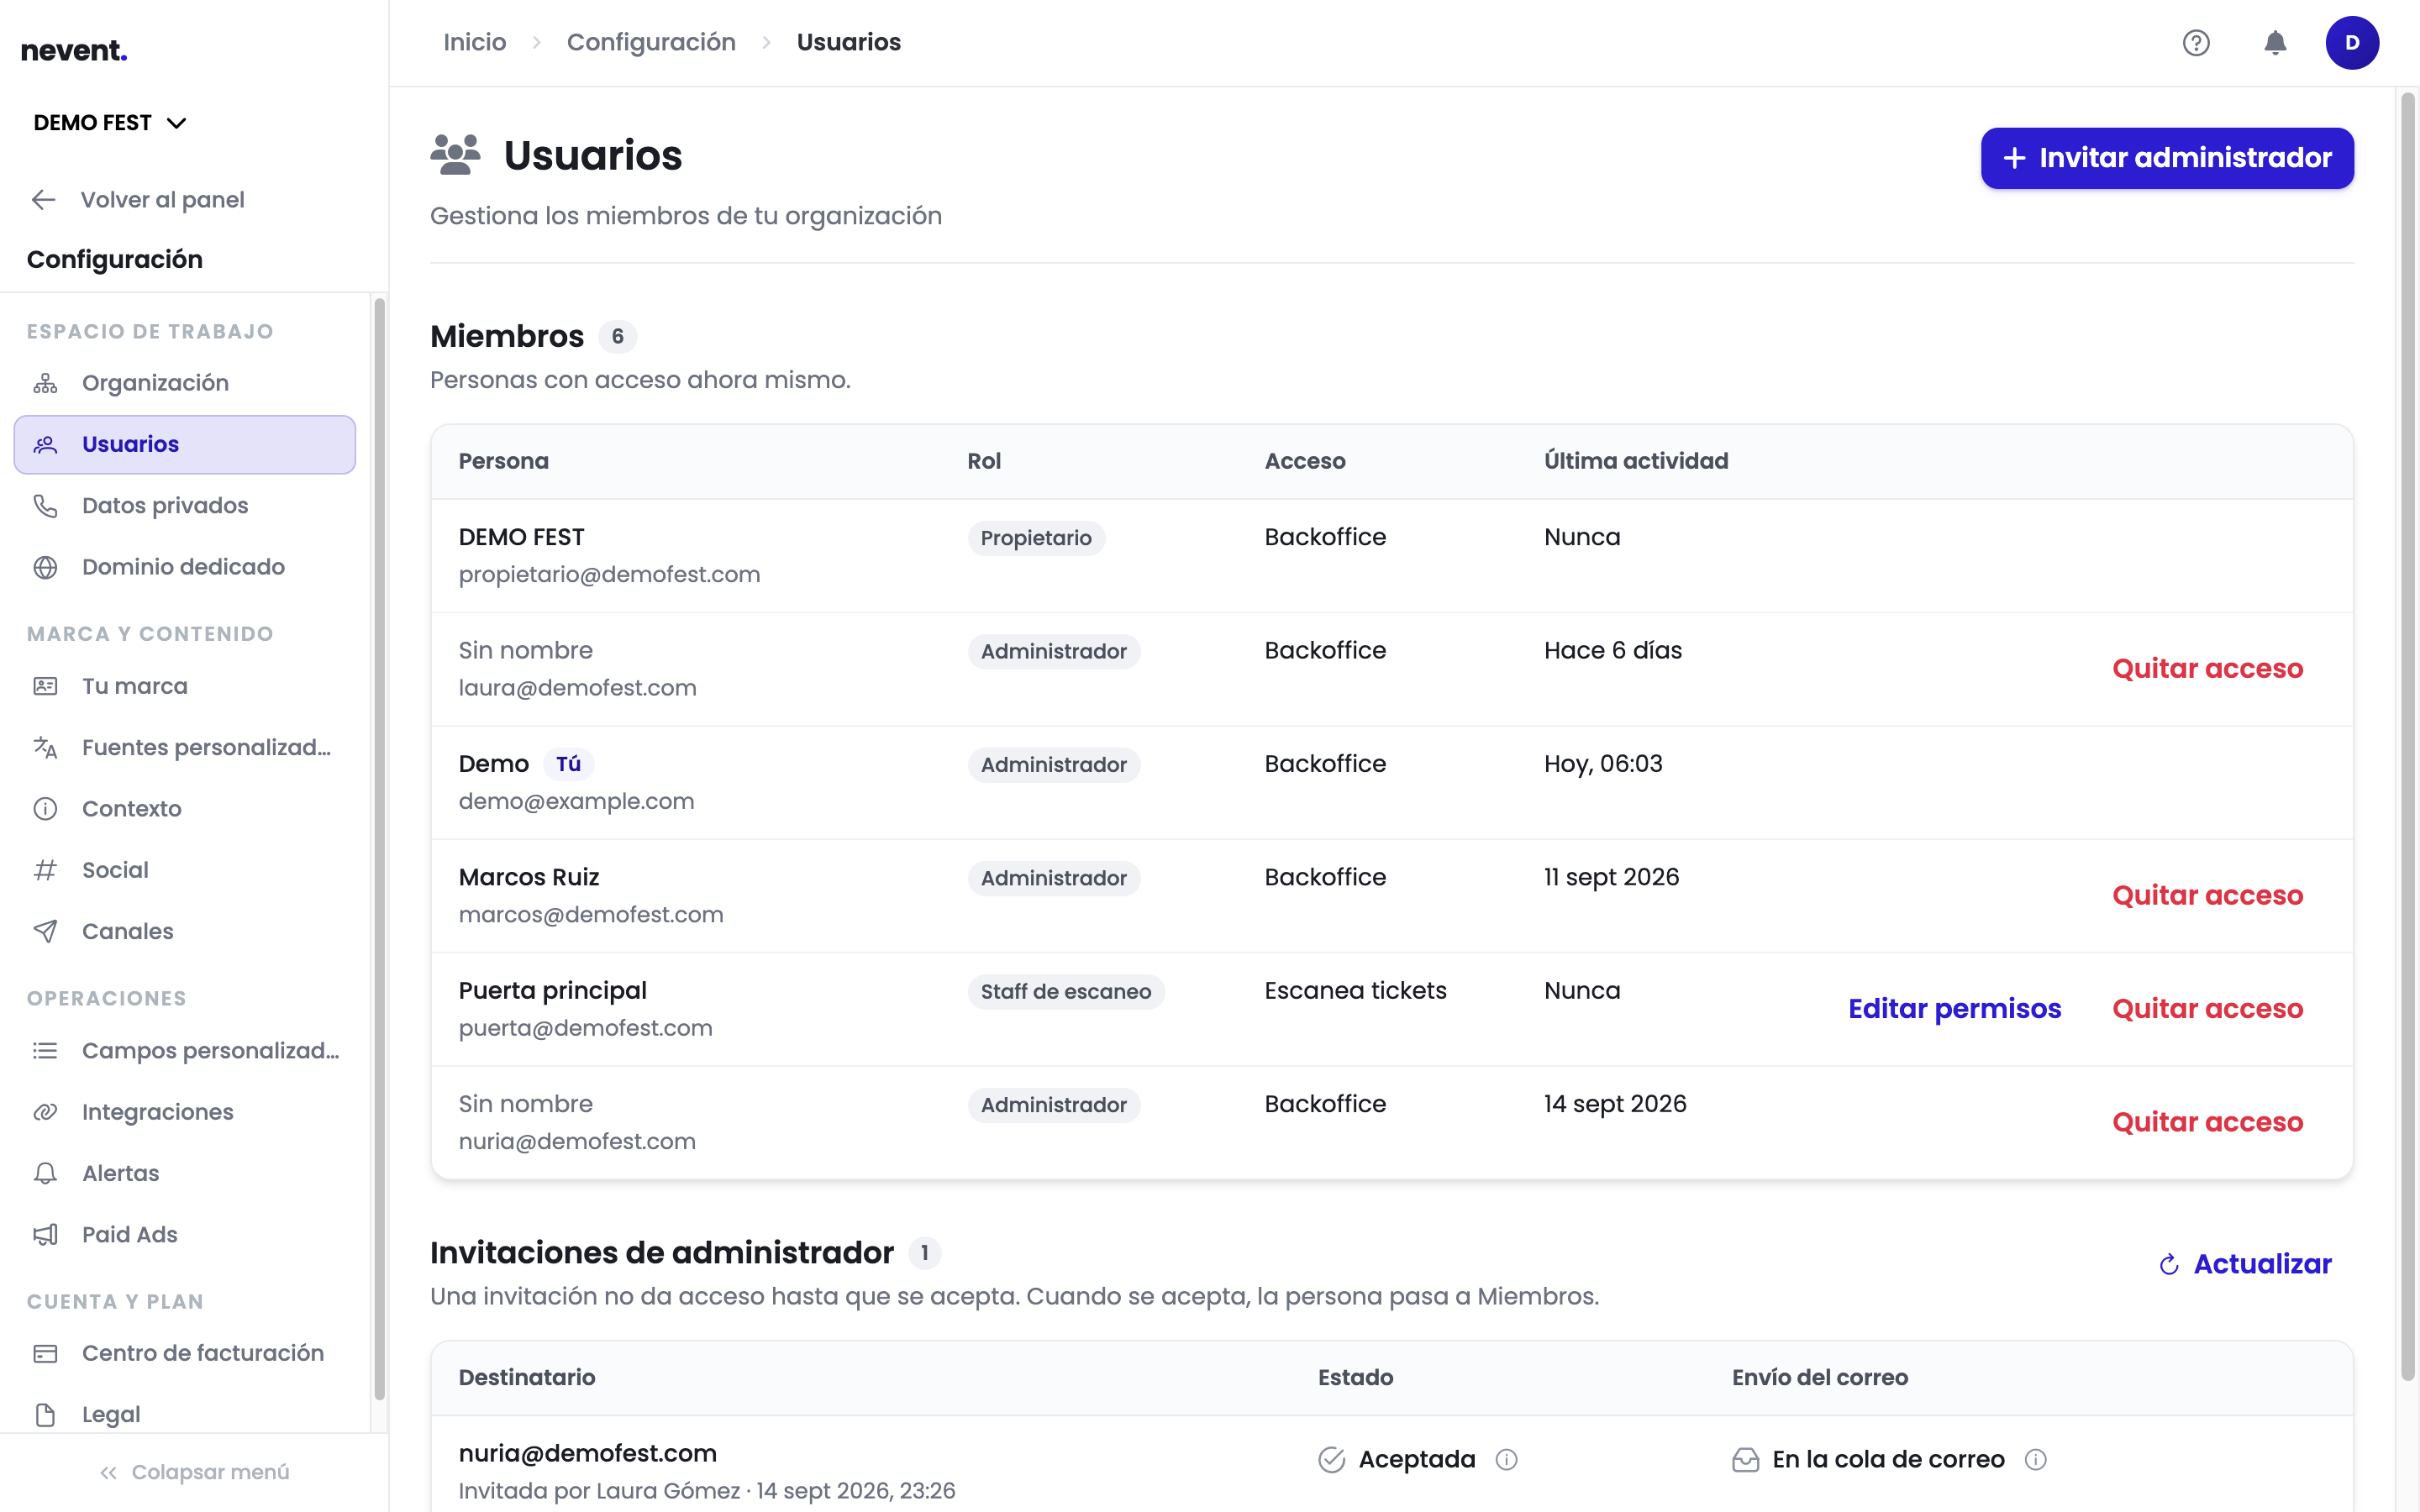
The Last activity column is the most useful one for reviewing access: it tells you whether someone has never signed in (“Never”) or when they last did.
The three roles
Section titled “The three roles”| Role | For whom | What it means |
|---|---|---|
| Owner | Whoever created the account | The original role. It cannot be assigned from this screen |
| Administrator | Your marketing and operations team | Full access to the organization’s back office. It is the only role you can invite |
| Scanning staff | Door staff on the day of the event | They only scan the resources you authorize: tickets, add-ons or personalizations |
Step 2: Invite an administrator
Section titled “Step 2: Invite an administrator”Press Invite administrator, at the top right. The window of the same name opens.
Type their email and confirm with Send invitation. The role is always Administrator: there is nothing else to choose.
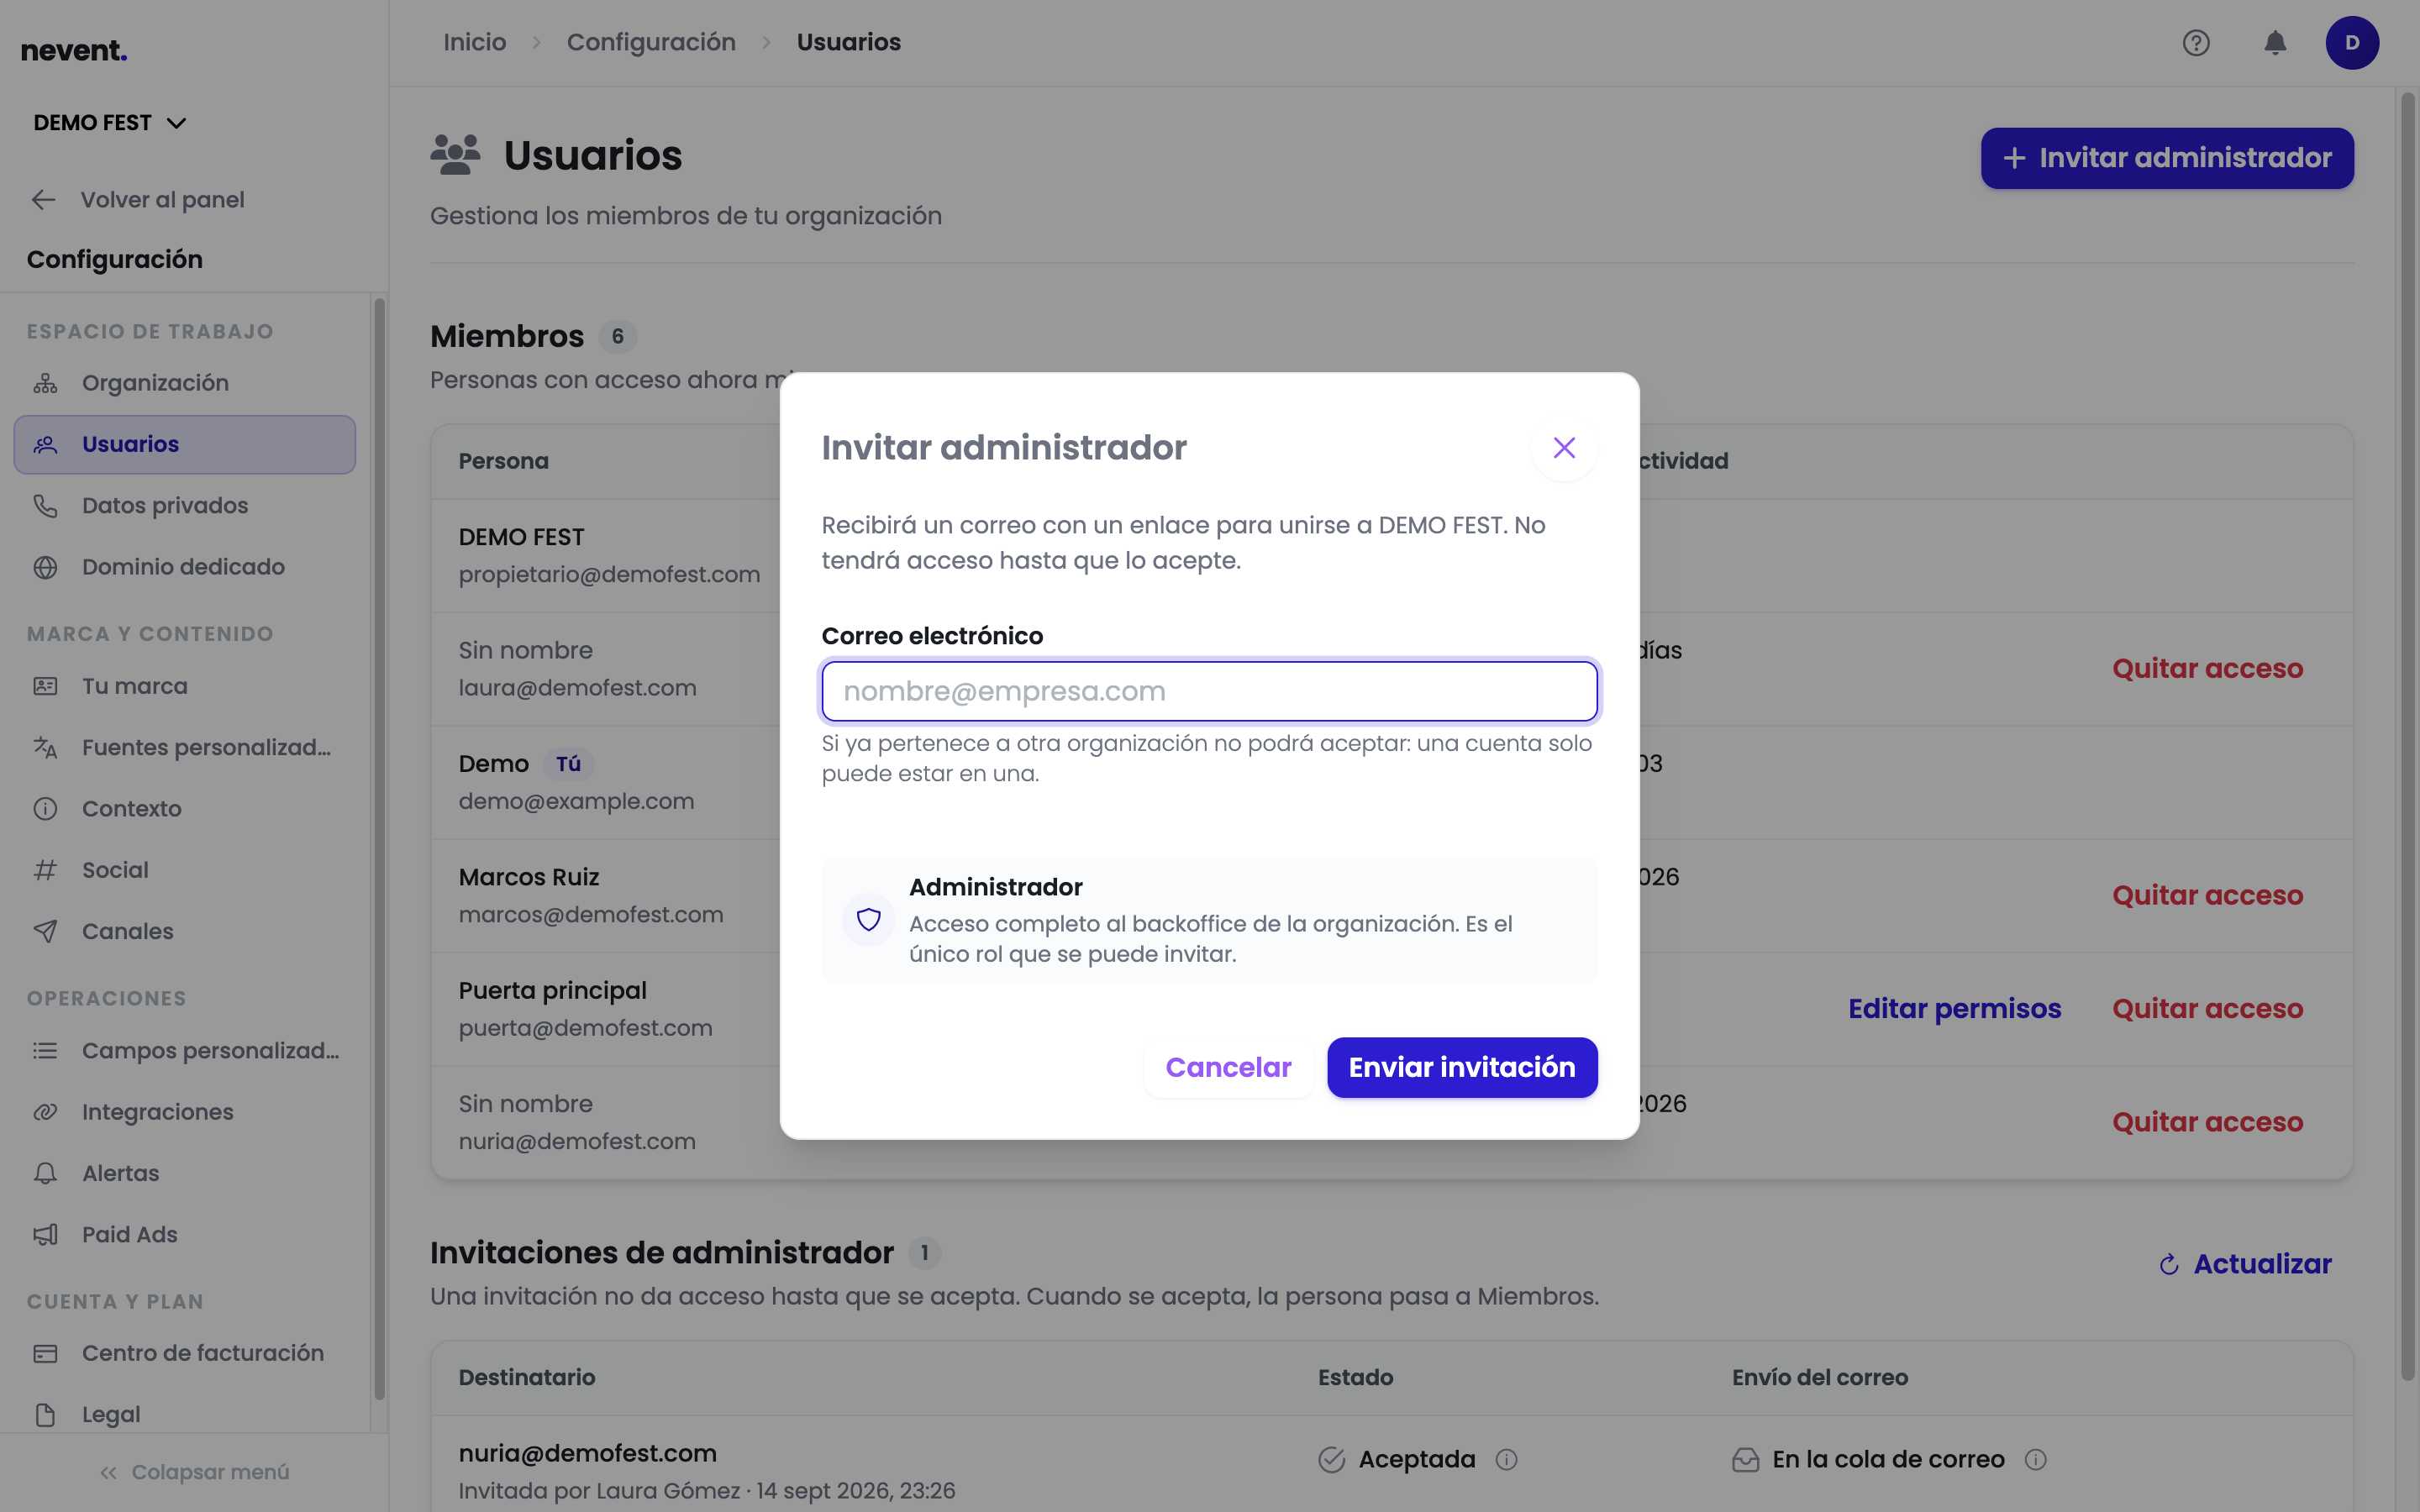
The person receives an email with a link to join your organization. They have no access until they accept it. When they do, they disappear from Administrator invitations and move to Members.
If there was already a pending invitation for that email, the dashboard tells you and you can resend it from its row. If that person is already part of your team, it tells you too.
Step 3: Follow the invitation’s status
Section titled “Step 3: Follow the invitation’s status”The Administrator invitations block shows each invitation with who sent it and when, and two status columns. Press the information icon next to each status to see what it means.
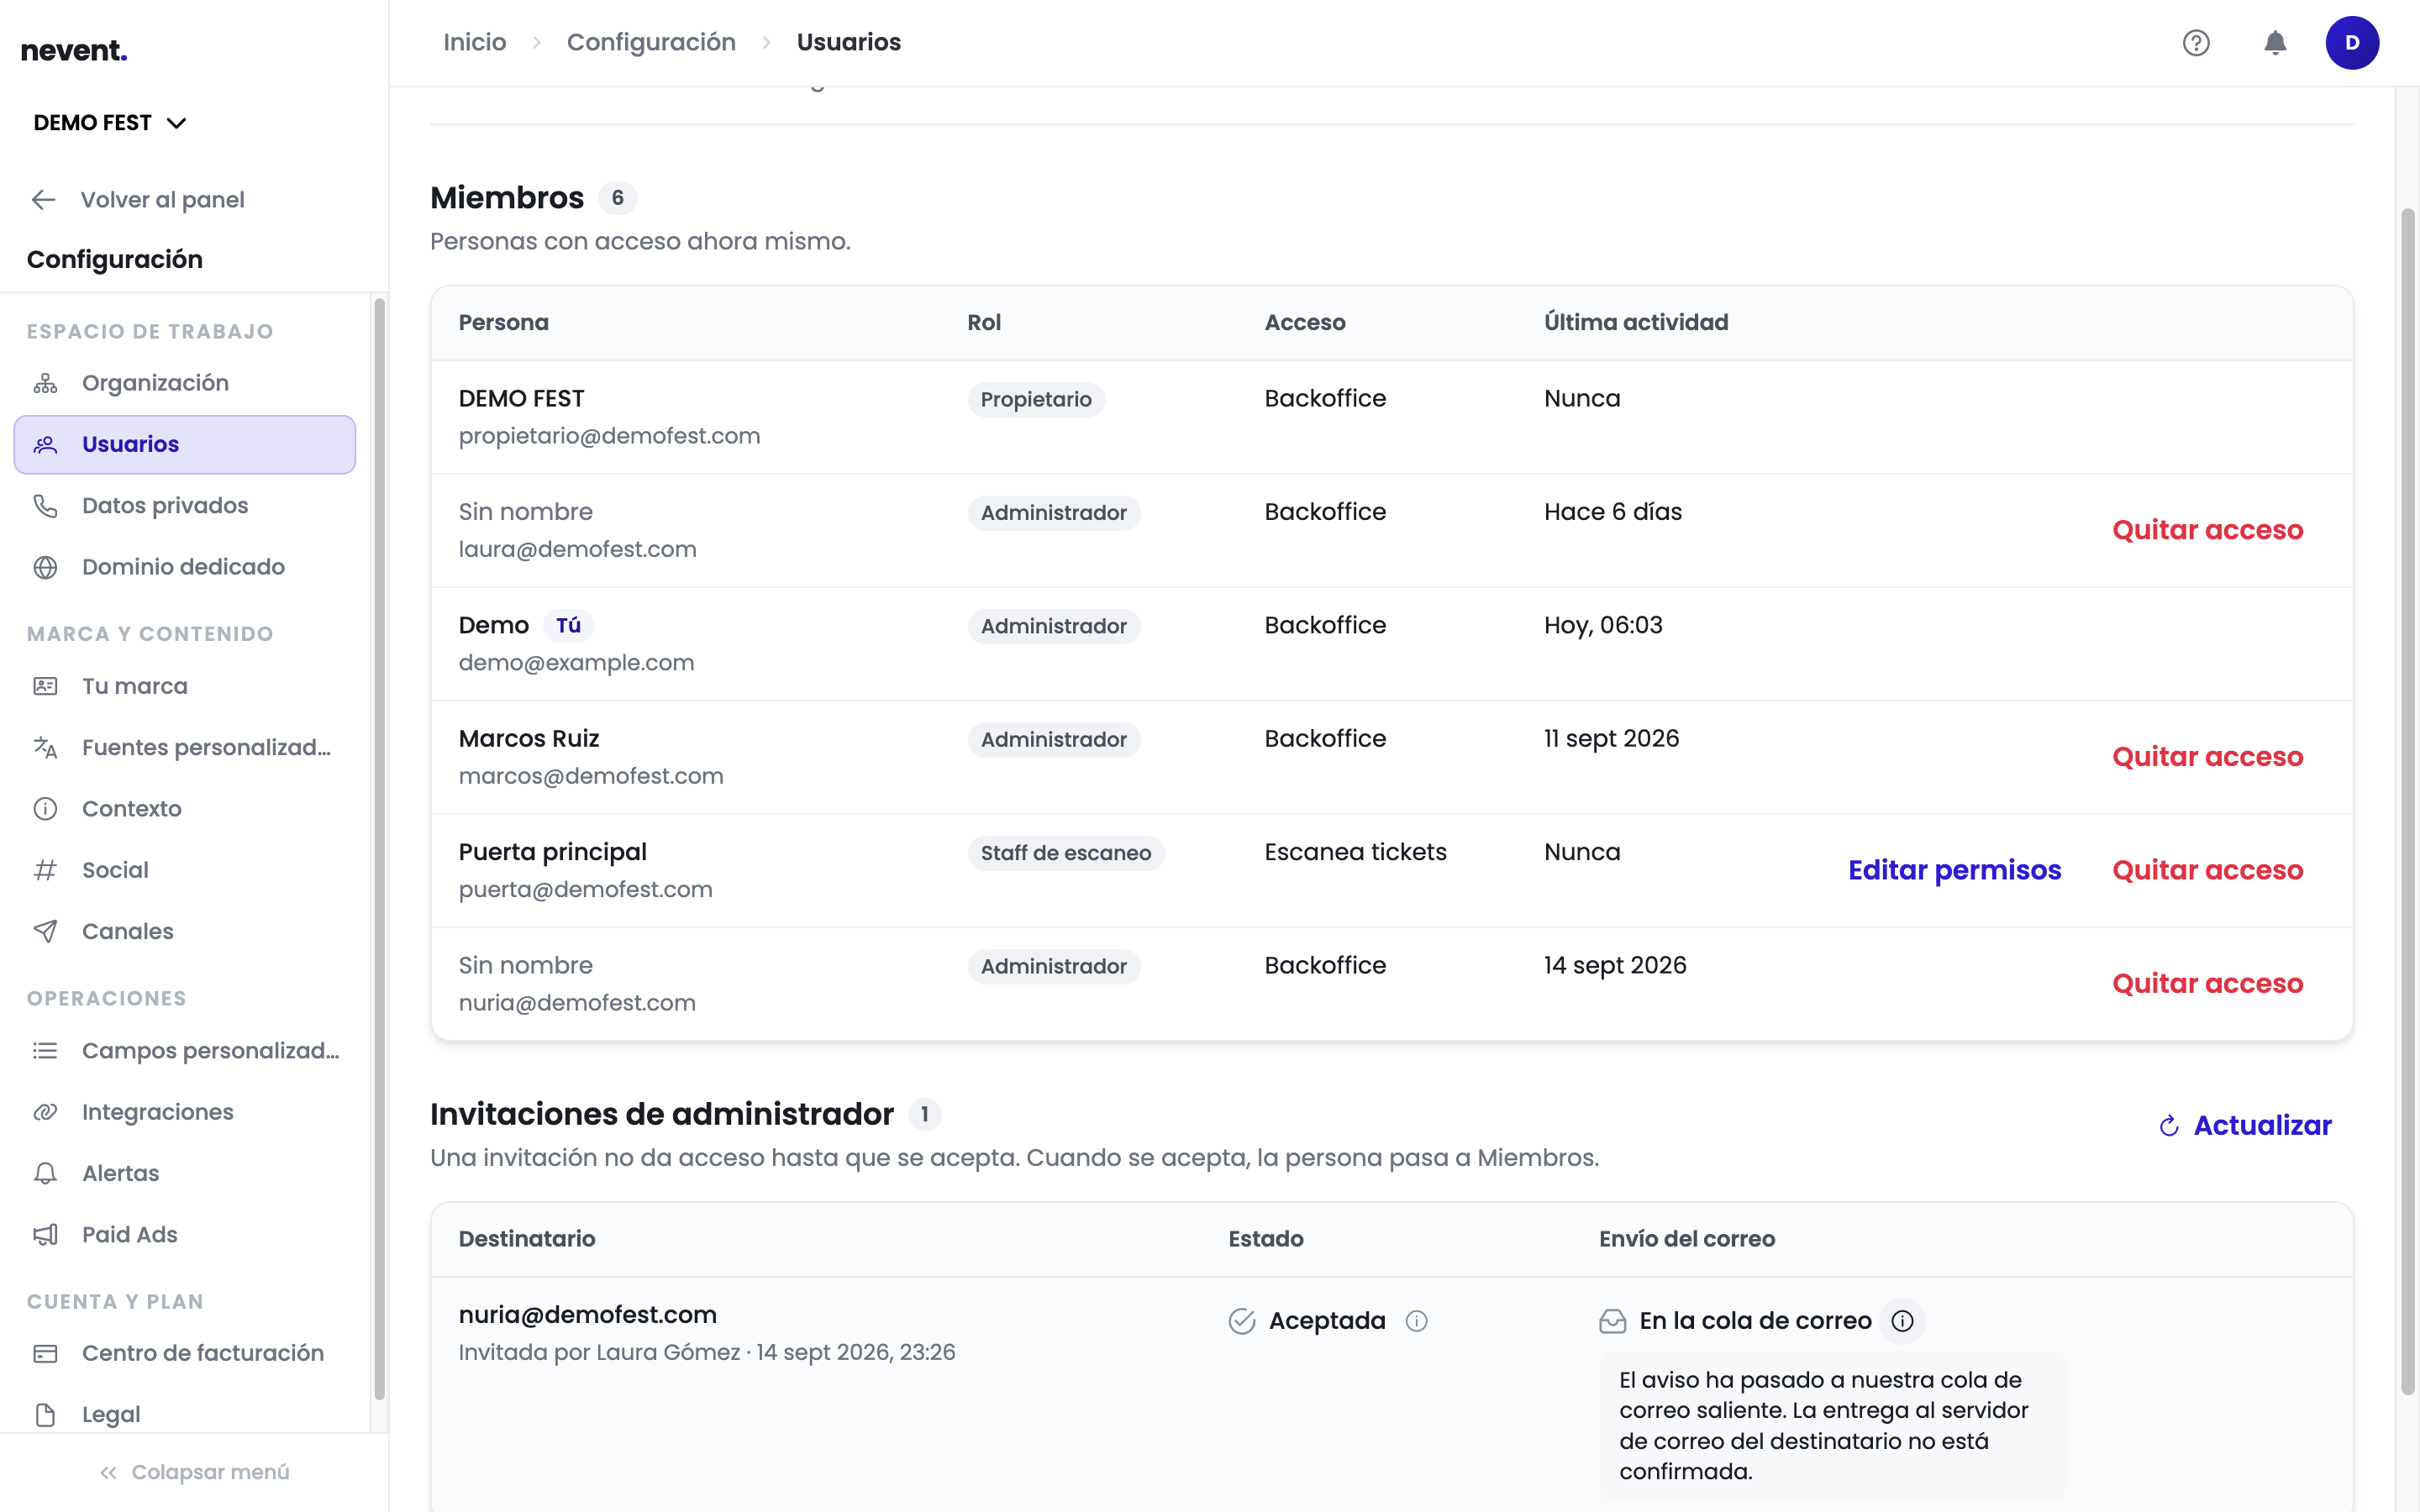
The Status column tells you where the invitation stands:
| Status | What it means |
|---|---|
| Pending | It is still open and can be accepted until its deadline |
| Accepted | The person who received it has joined the organization |
| Voided | Someone on your team voided it and its link no longer works |
| Declined | The person who received it declined it and it cannot be reopened |
| Expired | Its time ran out. You can invite this person again |
The Email delivery column tells you what is known about the notice email. It is information from the email provider, not about the person: “Delivered to the recipient’s server” means the recipient’s server accepted the notice, not that anyone has opened it. If you see Bounced or Rejected by the provider, check the address before resending.
While an invitation is Pending, its row lets you:
- Resend, which generates a new link. The previous one stops working.
- Revoke, which invalidates the link. It asks for confirmation and cannot be undone.
When an invitation has Expired, you have Invite again.
If you have just sent an invitation and do not see it updated, press Refresh in the block header.
Step 4: Change permissions or remove someone
Section titled “Step 4: Change permissions or remove someone”In the Members table, each row has its actions on the right:
- Edit permissions, only for scanning staff users. Check what they will be able to scan (Tickets, Add-ons, Personalizations), at least one option, and press Save changes.
- Remove access, which asks for confirmation before taking that person out of the organization. If you need them later, you will have to invite them again.
Your own row (marked You) and the owner’s row do not have these actions.
Review this list after each event: door staff are usually temporary and it makes no sense for them to keep access until the next one.
Next step
Section titled “Next step”- Your organization structure, to understand brands, organization and users.
- The three levels, if you manage several brands under the same organization.
- Activate your channels, so your team can start sending.