
Tutorial
How to connect your ticketing platform to Nevent
In this guide you’ll connect your ticketing platform to Nevent so your fans start entering your audience automatically, without you having to upload any file. It’ll take about 5 minutes.
You don’t need any technical knowledge. You just need to have on hand the credentials your ticketing provider gave you.
Before you start
Section titled “Before you start”You need two things:
- Admin access to your organisation in Nevent.
- Your ticketing platform’s credentials. Each provider asks for a different type: username and password, an API token or an API key. If you don’t have them on hand, your ticketing provider can give them to you from their own panel or through their support team.
Step 1: Go to Integrations
Section titled “Step 1: Go to Integrations”In the side menu, go to Settings and click Integrations, inside the Operations block.
You’ll see the list of integrations your organisation already has active. If it’s your first time connecting a data source, this list might be empty or only show other integrations that aren’t ticketing-related.
Step 2: Choose your ticketing provider
Section titled “Step 2: Choose your ticketing provider”Click Add integration. A list opens with all the available providers: Onebox, Fourvenues, Enterticket, Covermanager, DICE, CASFID, XCEED and Fever.
Find your ticketing platform in the list and read the short description to confirm it’s the right one.
Step 3: Enter your credentials
Section titled “Step 3: Enter your credentials”Click Configure on your provider’s card. A form opens with the fields that provider needs.
For example, if you’re connecting Fourvenues, Nevent asks for two keys: Channel Manager API and Integrations API. Other providers ask for a username and password, or a single API key or token.
Copy and paste each credential into its corresponding field. When you’re done, click Create integration.
Result
Section titled “Result”As soon as the connection activates, Nevent starts bringing in your fans automatically: every sale and every attendee from your ticketing platform becomes part of your audience in Nevent, without you having to do anything else.
Your ticketing platform is now connected. From now on, every time someone buys a ticket, they’ll show up in your fans list automatically.
How to change the credentials later
Section titled “How to change the credentials later”If your provider rotates the key, or the integration starts failing, you can change the credentials without rebuilding the connection.
In Settings → Integrations, click View on your integration and choose Edit.
Credentials that are already stored appear masked and read-only: Nevent neither shows them in full nor resends them when you save the configuration or the routing rules. If the connection is failing, this is also where you see the error the provider returns.
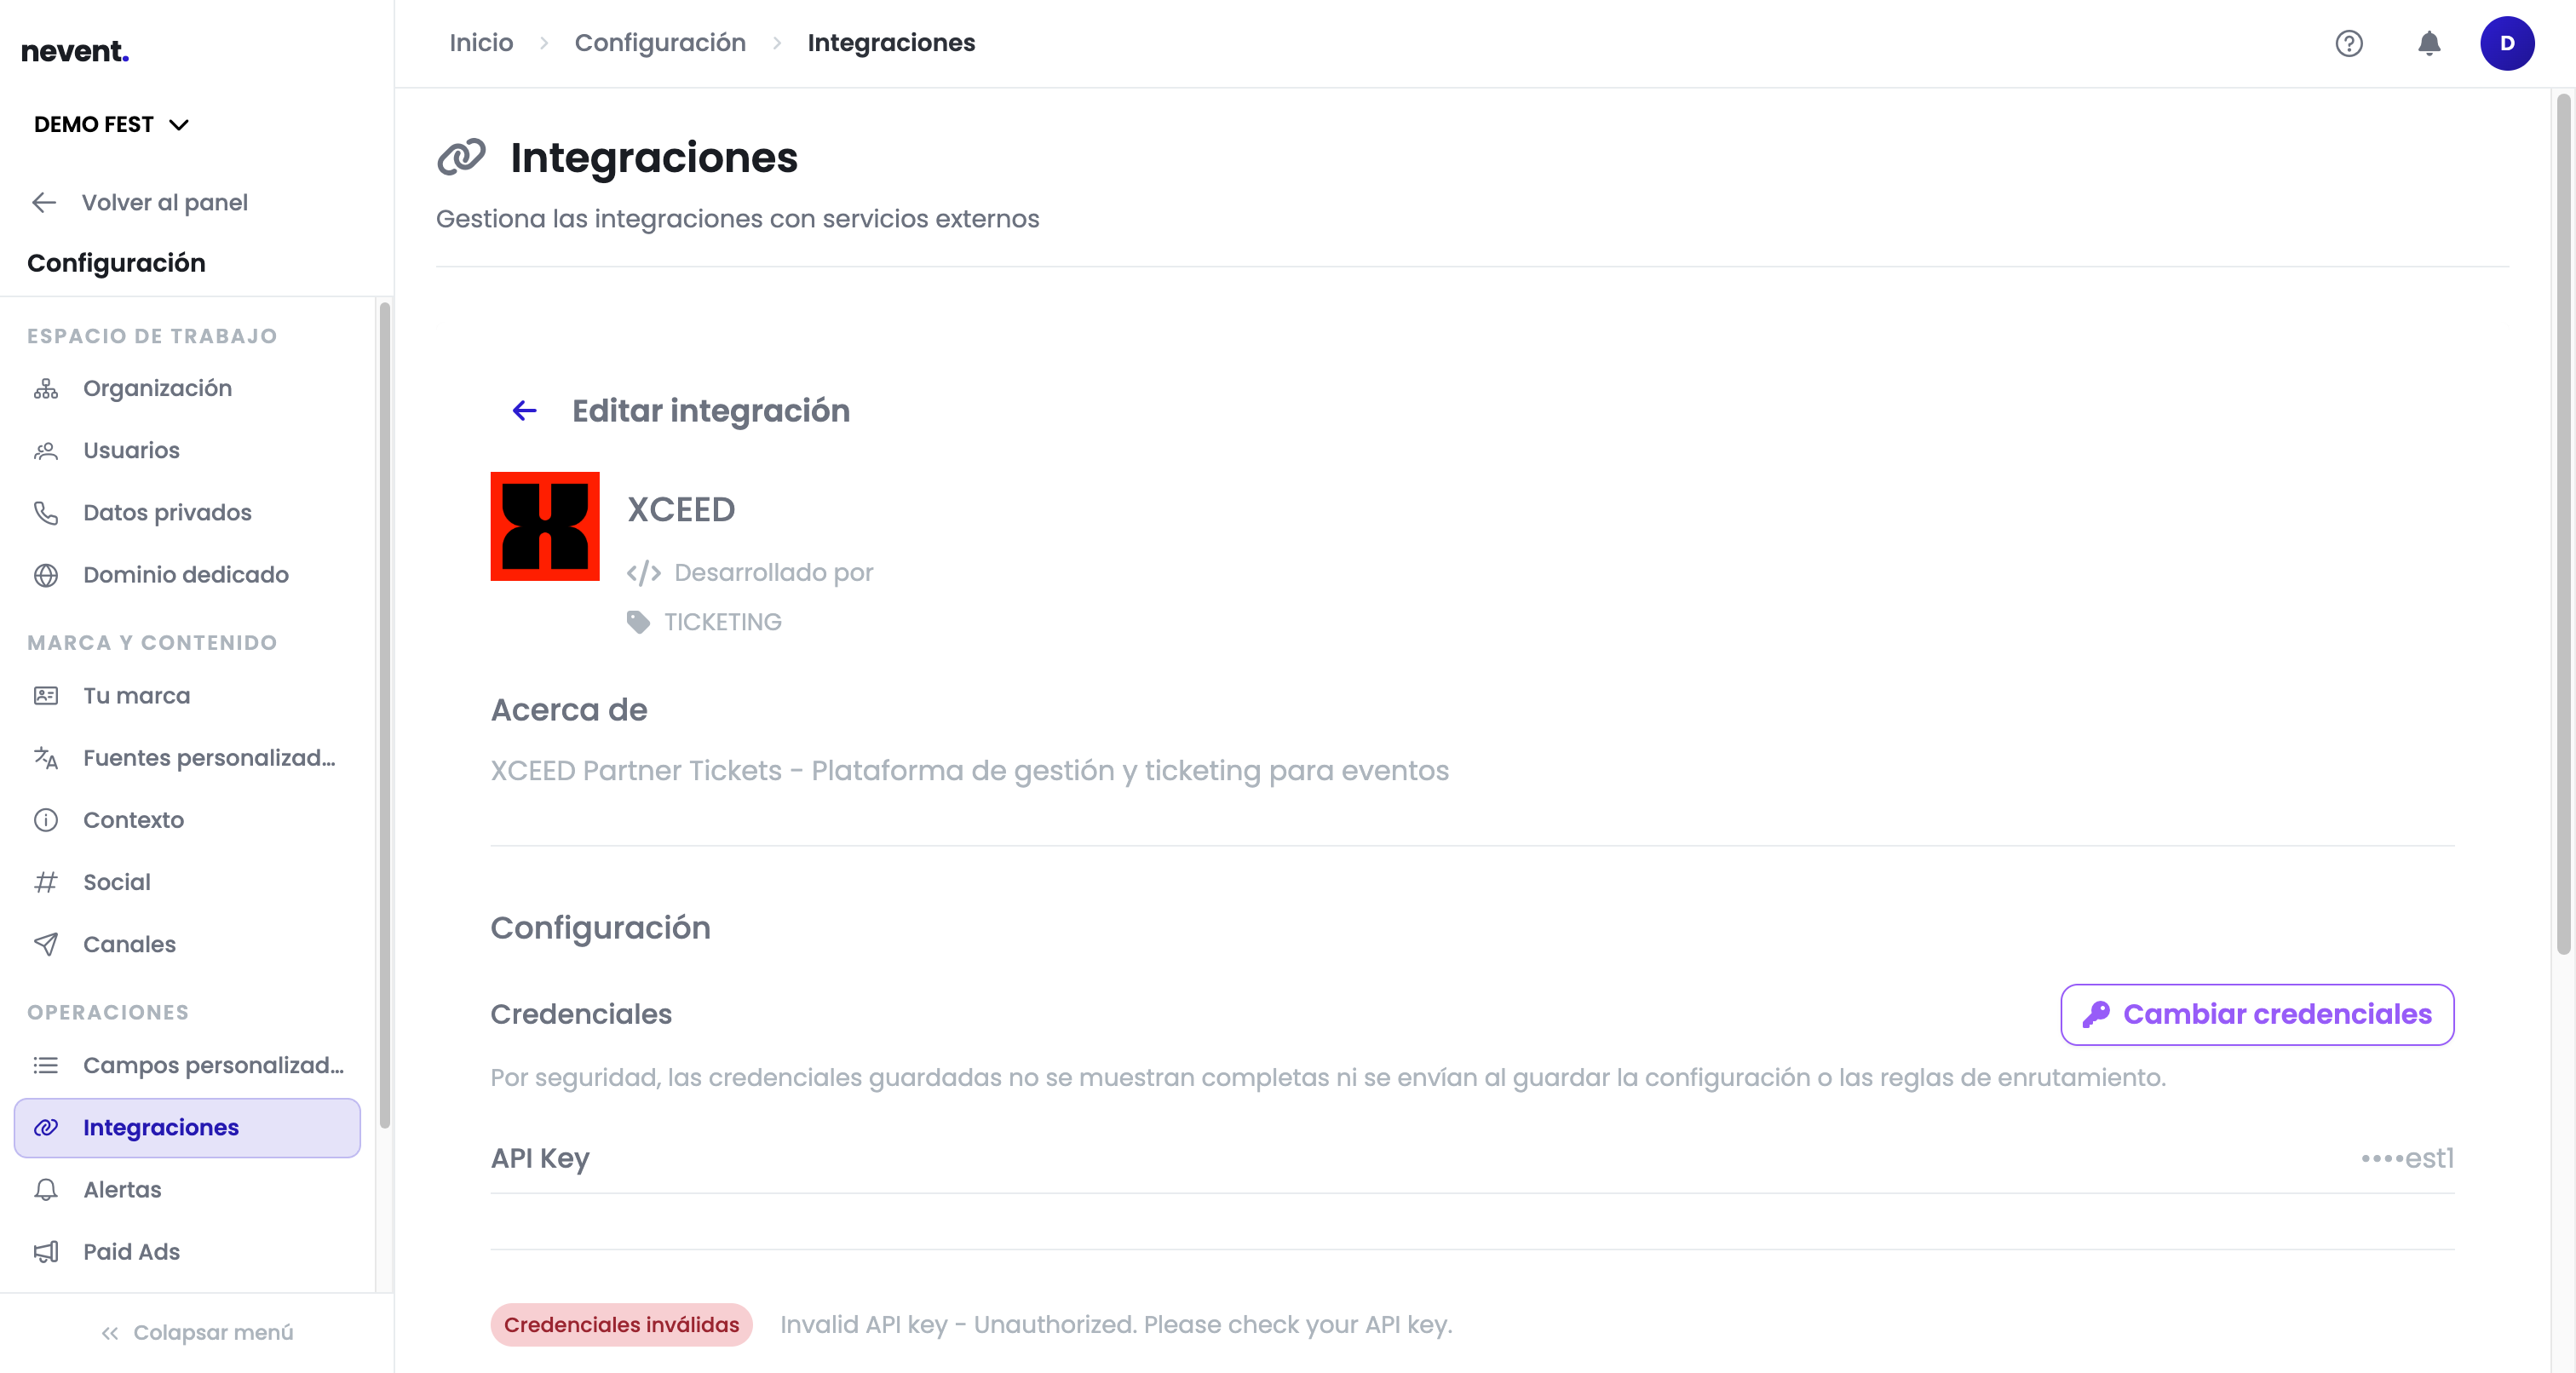
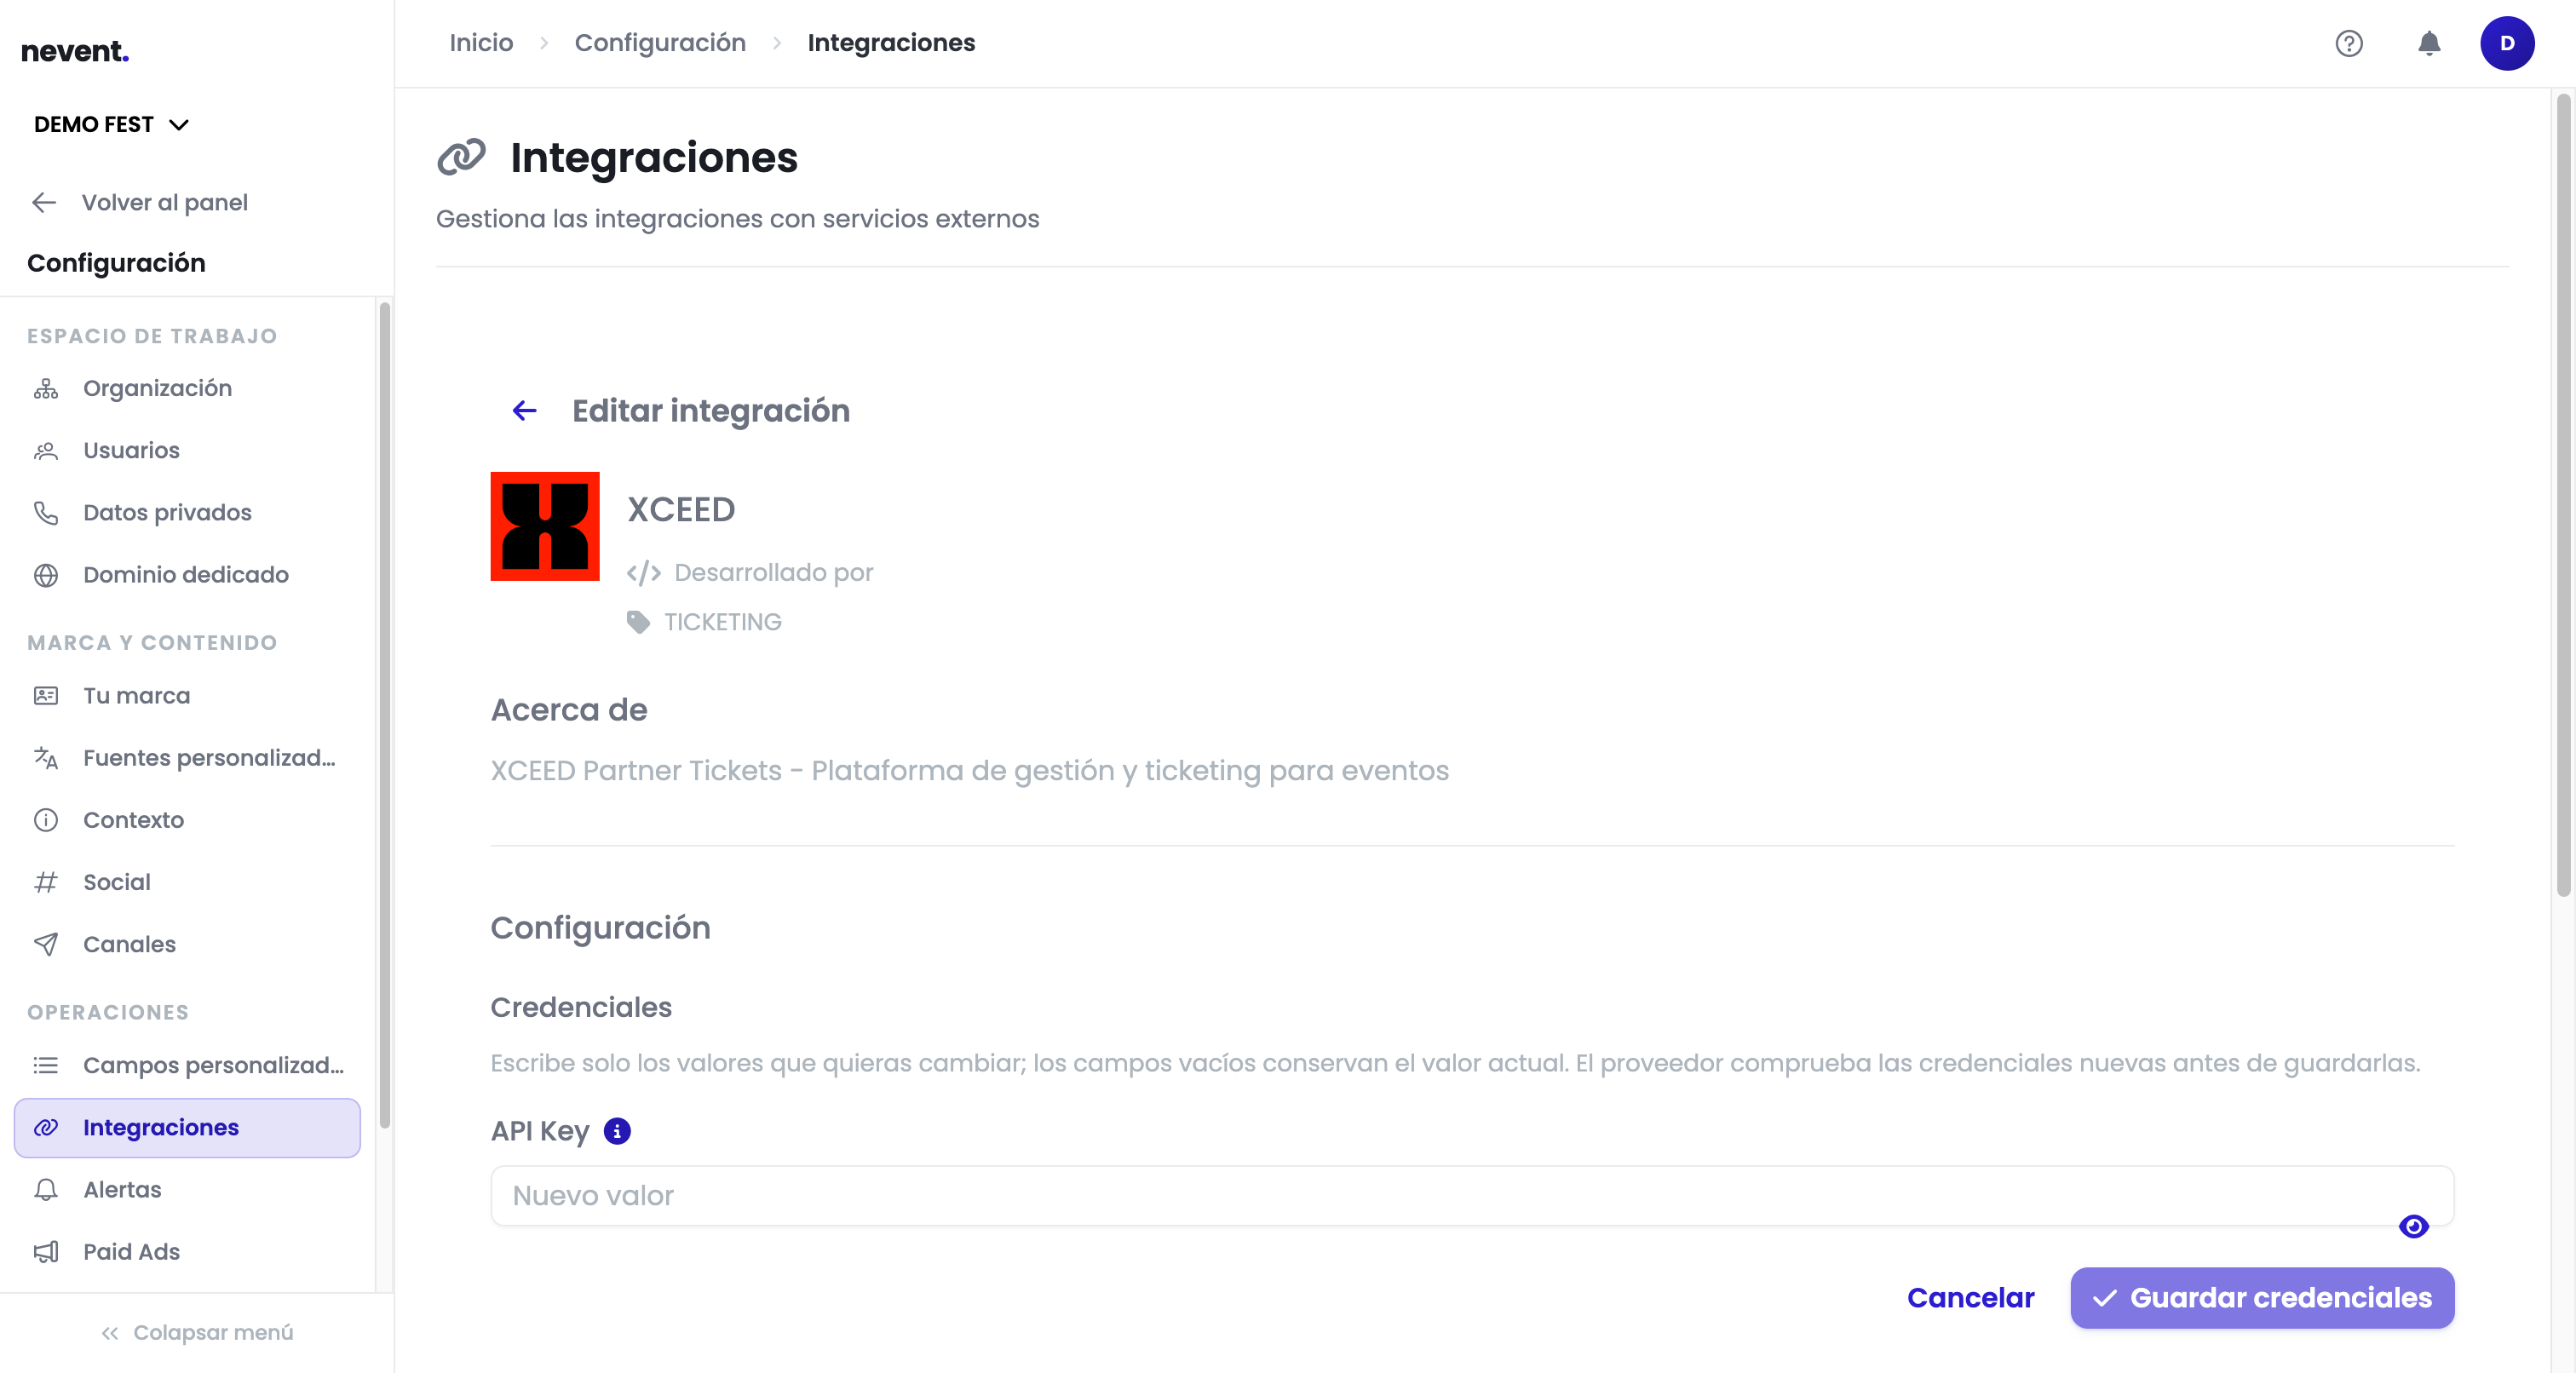
To change them, click Change credentials. A separate form opens with empty fields: type only the values you want to change, because any field you leave blank keeps its current value. When you click Save credentials, the provider verifies them before they are stored.
Next step
Section titled “Next step”- Why connecting your ticketing platform changes what you can do to understand the difference compared to importing a CSV.
- Create your first segment to start grouping the fans that are already coming in.
- Integrations reference to check which credential each provider needs.