
Cómo hacer
View and create your organization structure
También llamado: create a sub-account, labels per brand
Your organization structure is the foundation of everything else in Nevent: it determines who sees which data, how your events are separated and where your fans end up.
In this guide you check how your account is set up and create an organization below it. About 5 minutes.
Before you start
Section titled “Before you start”You need two things:
- The Owner, Administrator or Superadmin role. With other roles the screen does not open.
- To be in a level 1 or 2 organization. If you are inside a brand (level 3), you will see a restricted access notice. If you do not know which level you are on, step 2 tells you.
Step 1: Open the organization view
Section titled “Step 1: Open the organization view”In the side menu, go to Settings and, in the Workspace block, click Organization.
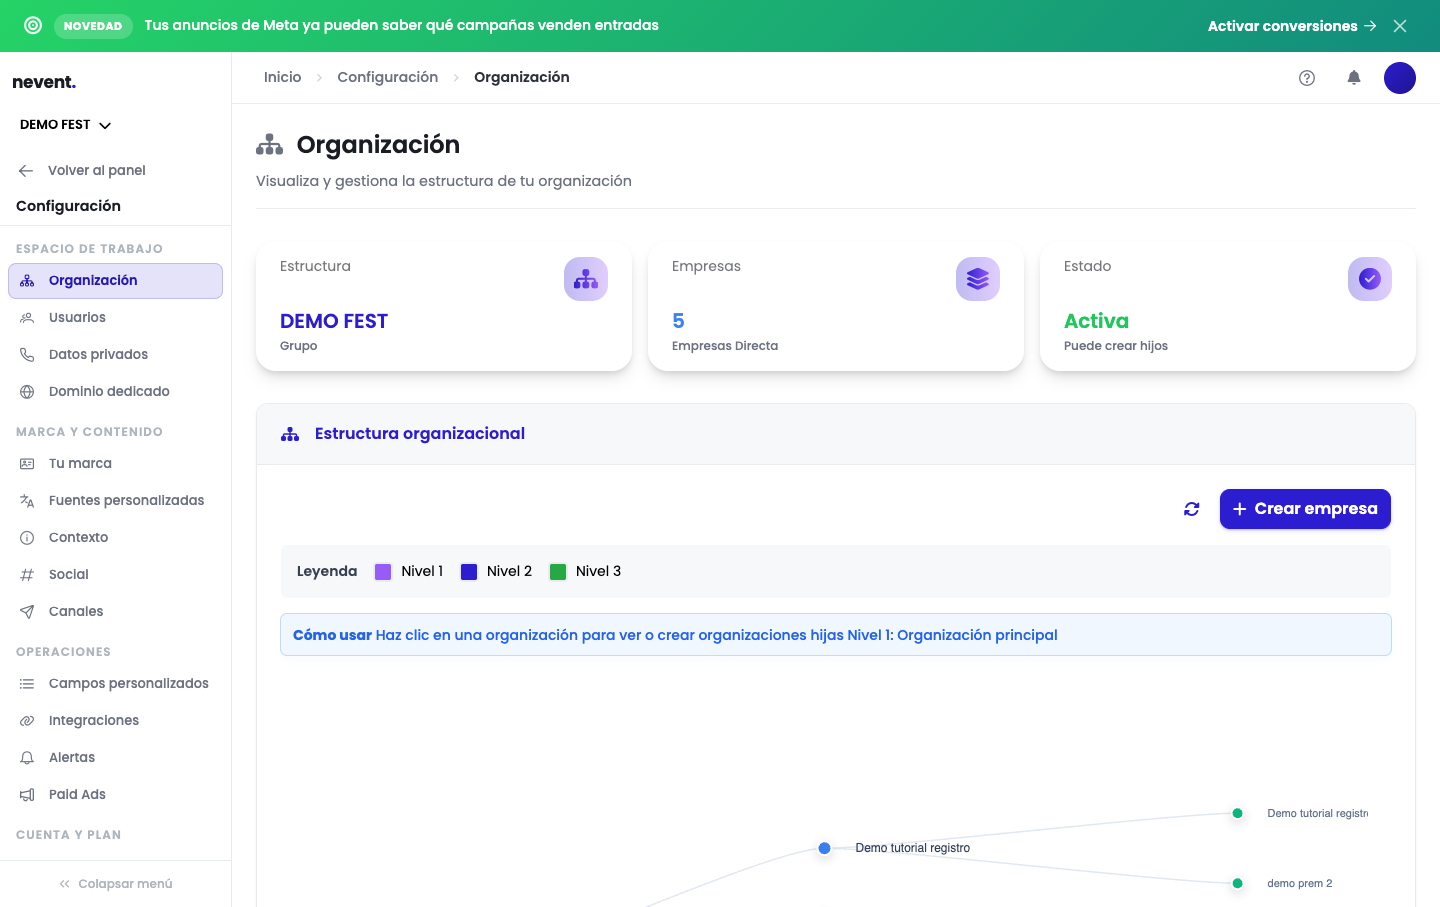
The Organization screen opens, with the summary at the top and the map of your structure below.
Step 2: Read your organization’s status
Section titled “Step 2: Read your organization’s status”The three cards at the top answer the three questions that matter:
- Structure: your organization’s name and what type it is: Group, Company or Brand. This is where you see which level you are on.
- Companies: how many organizations hang directly from yours. Those below them are not counted here.
- Status: whether it is Active and whether it can create children. The latter tells you at a glance whether you have room below or are already on the last level.
Step 3: Read the map
Section titled “Step 3: Read the map”Below, in Organization structure, your account is drawn as a tree. Each dot is an organization and the color shows its level, according to the legend:
- Level 1, the group, on the far left.
- Level 2, the companies below the group.
- Level 3, the brands below each company.
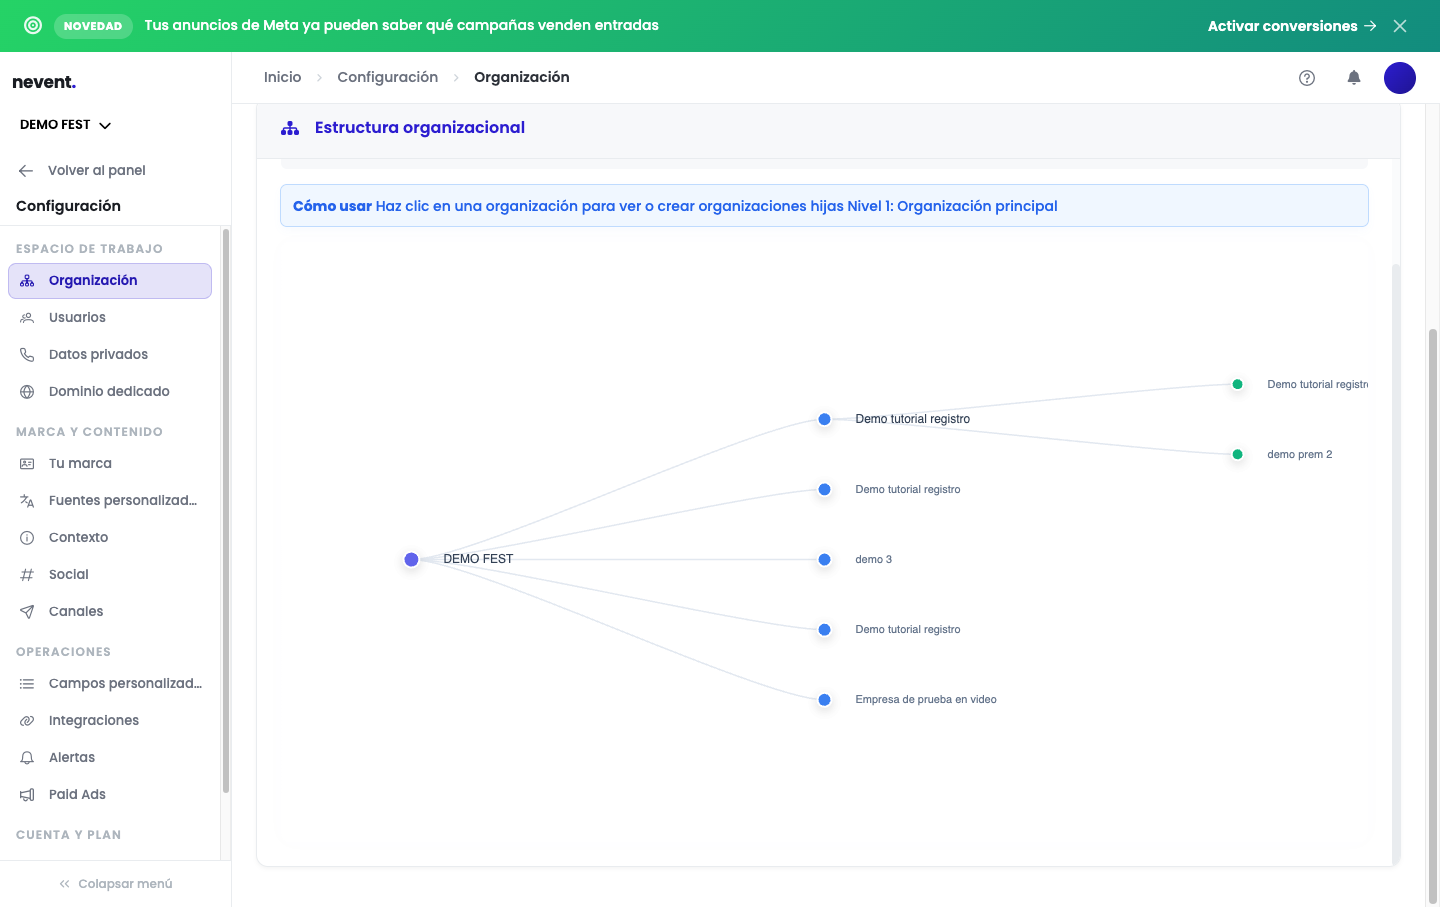
Click any organization on the map to see what hangs from it or to create something new inside it. The Refresh structure button, next to the create button, reloads the tree if you have just made changes.
What each level means and when to use one or another is explained in the three levels of an organization.
Step 4: Create an organization below
Section titled “Step 4: Create an organization below”Press the create button, at the top right of the map. The button text changes depending on where you are: from a group it says create company, from a company it says create brand. It never lets you create on a level that does not apply.
A window opens where you only have to type the name. It is required, and until you fill it in, the confirm button stays disabled.
Before confirming, read the notice line: it reminds you that what you are going to create hangs directly from the organization you are in now. If you are in the wrong place, cancel, click the right organization on the map and start again.
When you confirm, the new organization appears in the tree with the color of its level.
If you don’t see what you expected
Section titled “If you don’t see what you expected”- “You don’t have permissions to view organizational hierarchy”: your user is not an Owner, Administrator or Superadmin. Ask whoever manages the account.
- “This view is only available for level 1 and 2 organizations”: you are inside a brand. It is the last level and has no structure below to show.
- The tree does not reflect a recent change: press Refresh structure.